使用 pylon Viewer 設定 CXP 線陣相機與擷取卡#
如需關於需求與可能拓撲的資訊,請參閱 General Information。
安裝 pylon Software Suite#
若要安裝 pylon Software Suite 以配合 Basler racer 2 相機使用:
- 下載 pylon Software Suite 7.5.0 或更新版本。
- 啟動安裝程式並依照指示完成安裝。
-
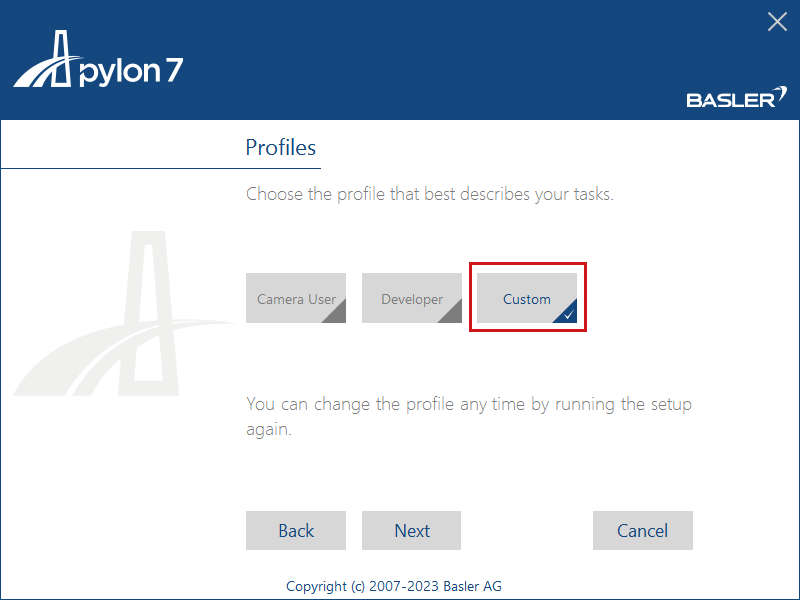
在 Profiles 對話方塊中,選取 Custom 安裝。
-
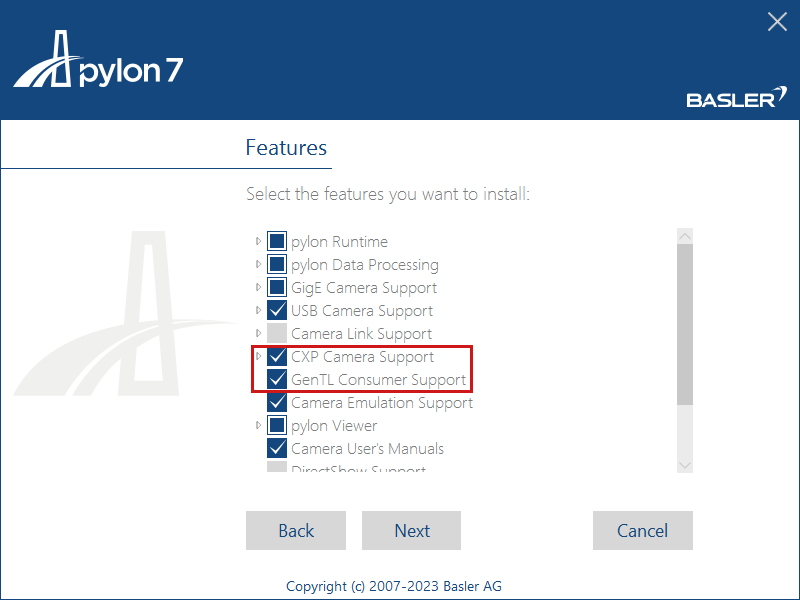
在 Features 對話方塊中,選取 CXP Camera Support 與 GenTL Consumer Support。
在 pylon Viewer 中為線形掃描相機進行設定#
若要在 pylon Viewer 中初步檢視影像:
- 啟動 pylon Viewer。
-
載入所需的 Applet:
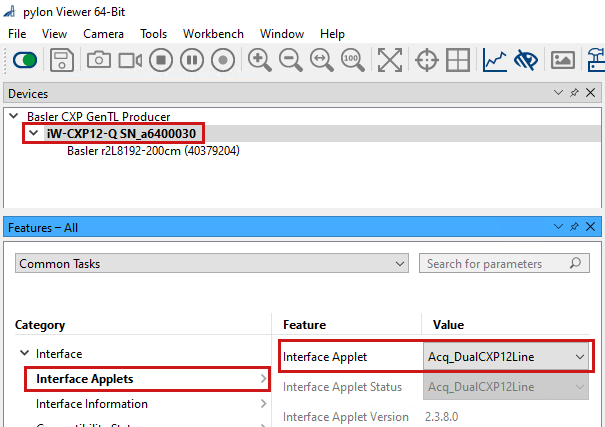
- 按兩下介面,也就是擷取卡或介面卡。
- 從 Category 檢視中選取 Interface Applet,然後選取您所需的 Applet。若要為您的硬體板卡與組態選擇正確的 Applet,請參閱 Possible Topologies。
-
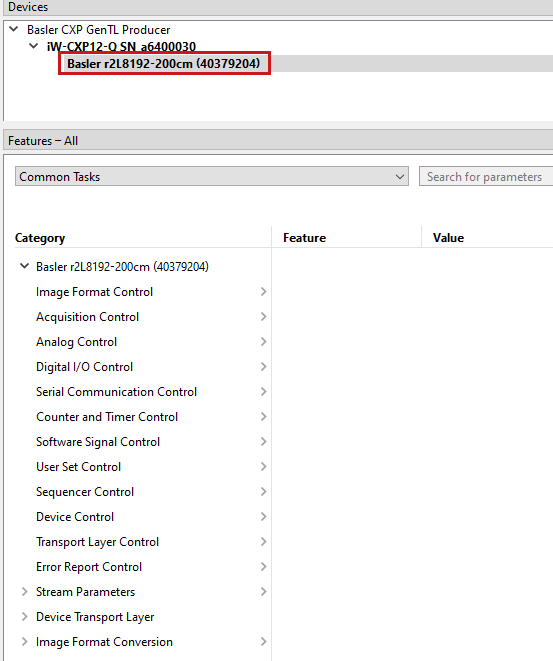
擷取卡的 FPGA 現已透過您的 Applet 進行設定。pylon Viewer 會自動偵測相機。按兩下您的相機。隨即會開啟裝置樹狀結構,顯示相機與擷取卡組態的 Property:
-
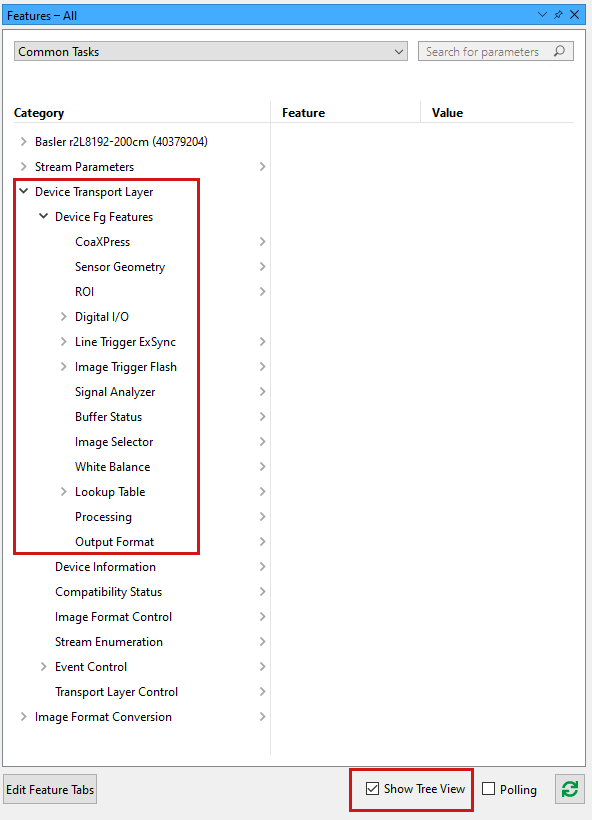
若要設定 Property,請啟用 Tree View。否則,所有 Property 都會列在同一個分類中。
-
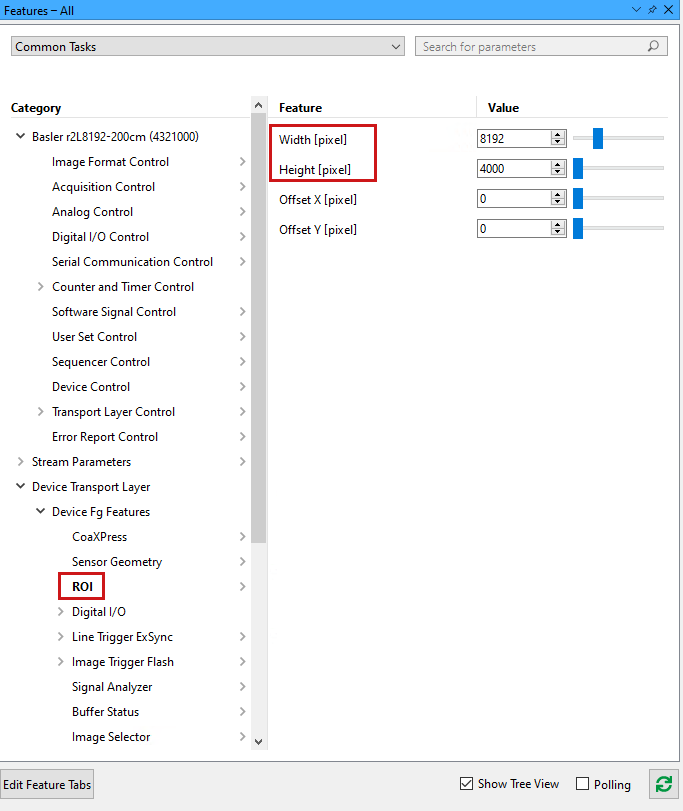
從 Category 檢視中選取 ROI,並根據您的需求設定 ROI 的 Width 與 Height。請注意,Height 是指合併為一個輸出畫面的指定相機行數。
-
您現在可以使用以下功能擷取畫格: Continuous Shot acquisition mode
 或 Single Shot acquisition mode
 .
- 根據您的需求,使用自訂設定來設定相機與擷取卡或介面卡。
- 如需關於 Trigger Mode 的資訊,請參閱 Triggered Image Acquisition 或技術知識文章 Configuring a Single-Ended Line Trigger with CXP-12 Interface Card and a Basler racer 2 CXP Camera。